3D printing has revolutionized rapid prototyping and custom manufacturing, but anyone who has printed a model knows that the final product often requires post-production finishing. Visible layer lines, small gaps, uneven surfaces, and minor flaws can affect the overall look and durability of your print. This is where primer becomes an essential tool in your post-processing arsenal.
In this blog, we’ll explore how to use primer effectively to fill gaps and smooth surfaces, when to combine it with fillers, and the best tips and tricks to achieve professional-quality results. We’ll also share insights from DigiGlen, a leading 3D printing service provider in Delhi/NCR and a sister concern of The Imagine Studio, which brings 15+ years of 3D modeling expertise and 10+ years of 3D printing experience across industries.
🔹 Why Post-Production Matters in 3D Printing
While 3D printing is highly accurate, it is not flawless. Depending on the technology (FDM, SLA, SLS, etc.), prints may show:
Layer lines (from FDM prints).
Small gaps or holes (especially in low-resolution prints).
Surface roughness (common in resin printing).
Assembly seams (when multiple parts are joined).
If left untreated, these imperfections can impact both the aesthetics and functionality of your model. Post-production ensures that your print looks professional, feels smooth to the touch, and is ready for painting, prototyping, or presentation.
🔹 Can You Use Primer to Fill Gaps?
The short answer: Yes — but only for small imperfections.
Primer is primarily designed to prepare the surface for painting by creating a uniform layer that hides minor flaws. Specialized filler primers (often used in automotive work) can fill micro scratches, shallow gaps, and uneven textures. However, for larger gaps or cracks, primer alone won’t be sufficient.
🔹 When to Use Primer Alone
Primer works best for:
Covering tiny pinholes.
Smoothing minor scratches and layer lines.
Preparing resin models for painting.
Giving your model a consistent surface finish.
Tip: Spray primers labeled “filler primer” or “high-build primer” are more effective at hiding imperfections than standard primers.
🔹 When to Use Filler + Primer
For bigger flaws, you need to combine filler with primer. Some popular fillers include:
Epoxy Putty (Milliput, Apoxie Sculpt): Ideal for structural gaps and reshaping details.
CA Glue + Baking Soda: A quick hack for fixing cracks and small seams.
Bondo / Automotive Spot Putty: Great for smoothing seams before priming.
The workflow is simple: Fill → Sand → Prime → Sand → Final Prime.
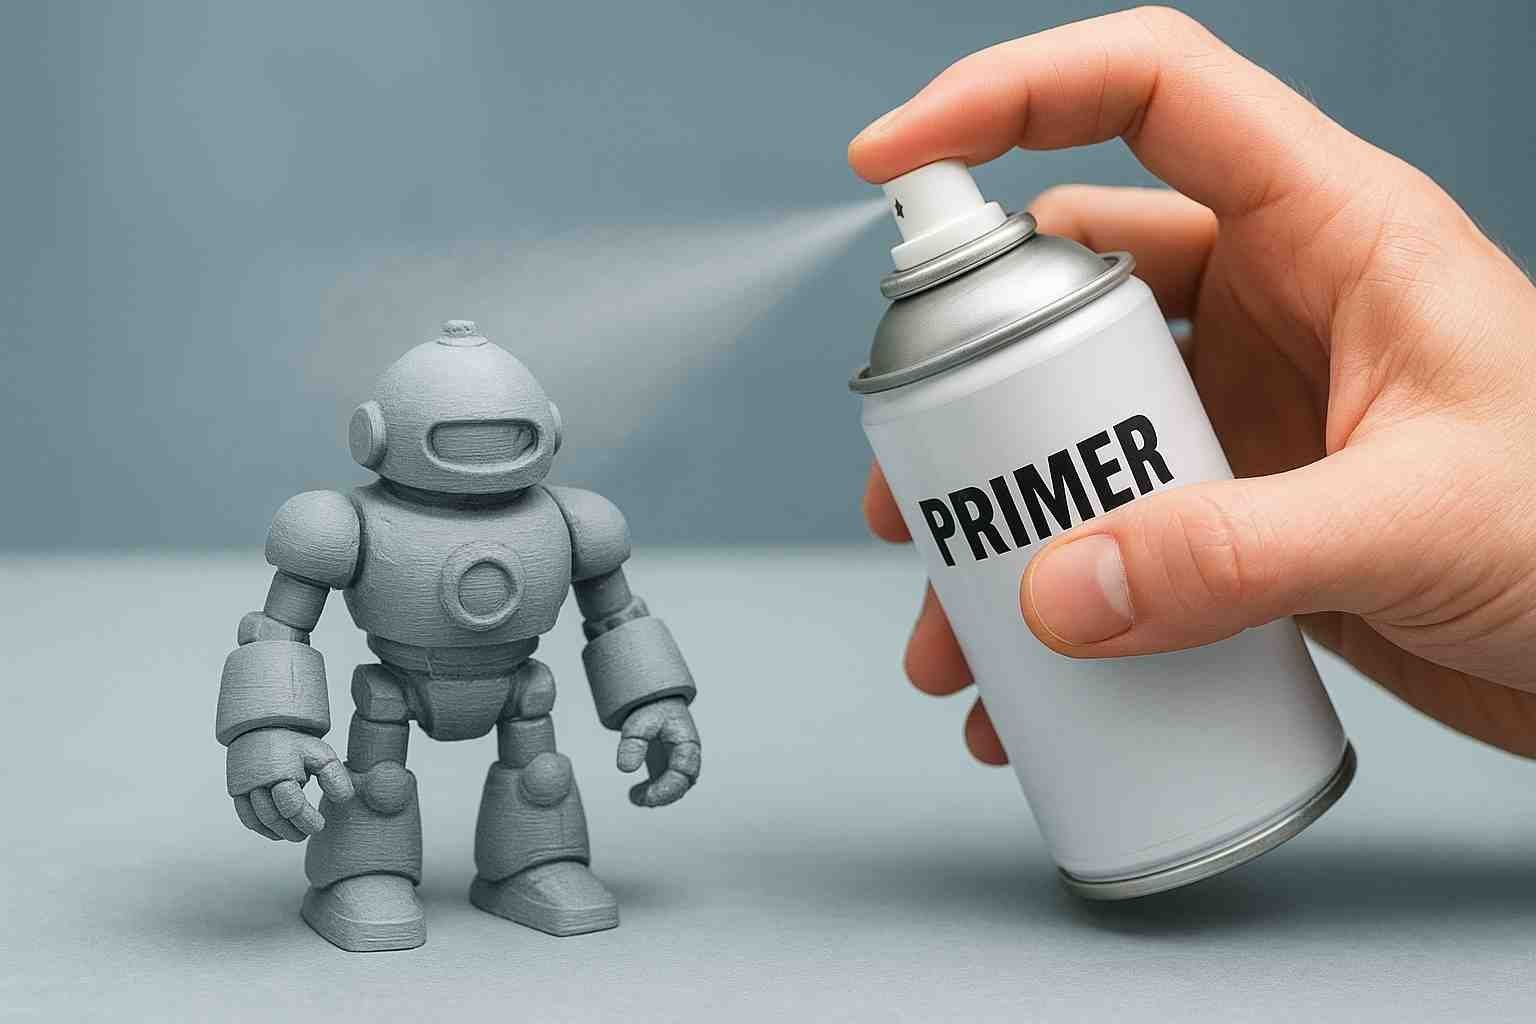
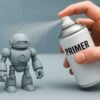
🔹 Step-by-Step Guide to Using Primer in Post-Production
1. Inspect Your Print
Check for gaps, rough areas, or seams. Decide whether they need filler or just primer.
2. Fill Large Gaps First
Use epoxy putty or spot putty. Let it cure completely, then sand it down.
3. Apply Primer (Thin Coats)
Hold the spray can about 6–8 inches away.
Apply 2–3 thin coats instead of one heavy coat.
Allow full drying time between coats.
4. Wet Sanding
Use 400–1000 grit sandpaper with water.
Sand in circular motions to achieve a smooth finish.
Be patient — this step is key for professional results.
5. Reapply Primer If Needed
Some imperfections may reappear after sanding. Repeat primer + sanding until satisfied.
6. Final Coat & Paint Prep
Apply a final light coat of primer to unify the surface before moving to painting or coating.
🔹 Tips & Tricks for Better Results
✅ Use a filler primer first, then a fine surface primer.
✅ Always sand between coats — this ensures the primer bonds well and smooths layer lines.
✅ Wear gloves and mask — primers contain solvents that can be harmful if inhaled.
✅ Work in a dust-free area — dust or lint will stick to wet primer.
✅ For resin prints, wash thoroughly with IPA before priming to remove residues.
✅ Warm the spray can slightly in hot water (not boiling) for smoother spraying.
✅ Test spray on scrap before applying to your model.
🔹 Common Mistakes to Avoid
❌ Spraying primer too close → causes runs and thick uneven coats.
❌ Skipping sanding → results in a rough surface even after multiple coats.
❌ Using primer for big gaps → leads to cracks showing through later.
❌ Rushing drying times → primer needs time to cure fully before sanding.
🔹 DigiGlen’s Expertise in 3D Printing Post-Production
At DigiGlen, we don’t just stop at printing your models — we ensure they look flawless. With over 15 years of experience in 3D modeling and a decade of expertise in 3D printing, our team specializes in delivering production-ready models for industries like automotive, architecture, healthcare, manufacturing, and consumer products.
As a sister concern of The Imagine Studio, DigiGlen combines technical precision with artistic finishing to help clients turn rough 3D prints into polished, professional prototypes. Whether it’s filling, sanding, priming, or painting, our experts know the exact workflow to make your ideas stand out.
“Your design deserves to look as good in reality as it does on screen — and post-production is where the magic happens.”
🔹 Final Thoughts
Using primer in post-production is one of the simplest yet most powerful ways to improve your 3D prints. While it won’t replace fillers for major repairs, it’s unbeatable for smoothing surfaces, preparing for paint, and giving your models a professional finish. By combining filler + sanding + primer, you can achieve a factory-like look that impresses clients and enhances functionality.
Whether you’re a hobbyist or a business looking for professional prototypes, mastering post-production will elevate your 3D printing projects. And if you need expert help, DigiGlen’s team is always ready to bring your ideas to life with precision and polish.
Conclusion
Selecting the right 3D printing partner goes beyond comparing prices — it’s about expertise, consistency, and long-term value. By paying attention to factors such as technology, material options, design support, quality standards, turnaround times, and proven industry experience, businesses and individuals can make smarter choices and achieve superior outcomes.
With DigiGlen’s proven expertise — over 15 years in 3D modeling and a decade of hands-on 3D printing experience — turning concepts into reality becomes seamless. From a single prototype to short-run production, DigiGlen ensures every project is handled with precision and care.
👉 Looking to transform your ideas into reality? Connect with DigiGlen today and discover a new level of accuracy, dependability, and flexibility in 3D printing.
Recent Comments
Post Widget
How to Choose the Best 3D Printing Filament: A Complete Guide
What is Layer Height in 3D Printing?
Mastering 3D Print Post-Production
Social Media Widget

Customer service
It’s not actually free we just price it into the products.

Fast Free Shipping
Get free shipping on orders of $150 or more
(within the US)

Returns & Exchanges
We offer free returns and exchanges within 30 days of purchase.

Secure payment
Your payment information is processed securely and encrypted.